Here is the survey I have created in able to get feedback on my music video clip. The results of this survey will be seen in my evaluation stages.

Thursday, 23 March 2017

Thursday, 2 February 2017


Monday, 16 January 2017
Poster Editing and Construction
The following video above helped me to create a background for my poster using a photograph that I have taken of a floating smoke using self timer on my camera.
In able to create my poster I have had to edit the raw photograph that I have taken. I have done it by firstly increasing the exposure to create a totally white background. After that I have reflected the image because I wanted the character to face the other way. The next step was adding the smoke that I have managed to do due to the availability of the smoke as a photograph and the knowledge that I have received from the tutorial above.
Secondly I have done the writings, added the album cover, the record label logos, and at very last I have created a gold layer that I have applied in particular parts of the writings by keeping the ALT key down on my key board and clicking on the layer that I wanted the gold colour effect on.
Further more I have cut the character's head out in able to place it on front of the writings. I have done this by using a layer mask and brushing through with a black paint brush which allowed me to remove the parts from the writings that covered the characters face
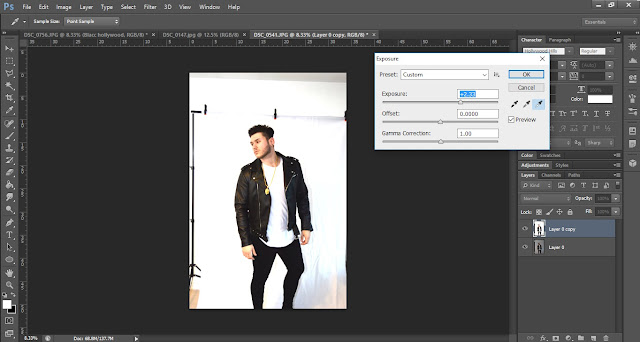
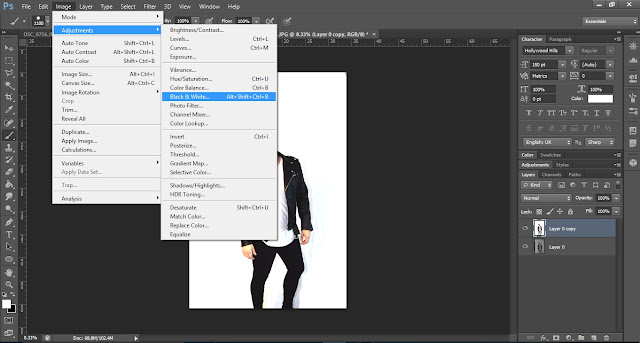
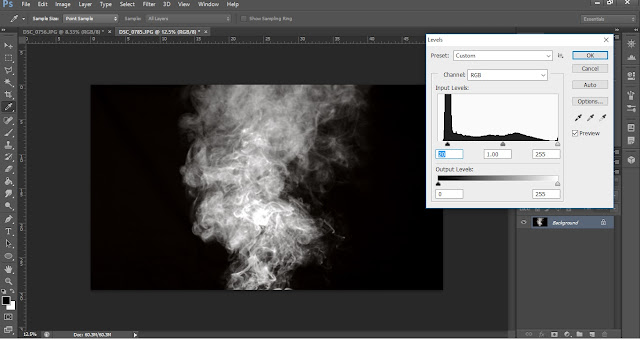


In able to create my poster I have had to edit the raw photograph that I have taken. I have done it by firstly increasing the exposure to create a totally white background. After that I have reflected the image because I wanted the character to face the other way. The next step was adding the smoke that I have managed to do due to the availability of the smoke as a photograph and the knowledge that I have received from the tutorial above.
Secondly I have done the writings, added the album cover, the record label logos, and at very last I have created a gold layer that I have applied in particular parts of the writings by keeping the ALT key down on my key board and clicking on the layer that I wanted the gold colour effect on.
Further more I have cut the character's head out in able to place it on front of the writings. I have done this by using a layer mask and brushing through with a black paint brush which allowed me to remove the parts from the writings that covered the characters face




Poster mock ups


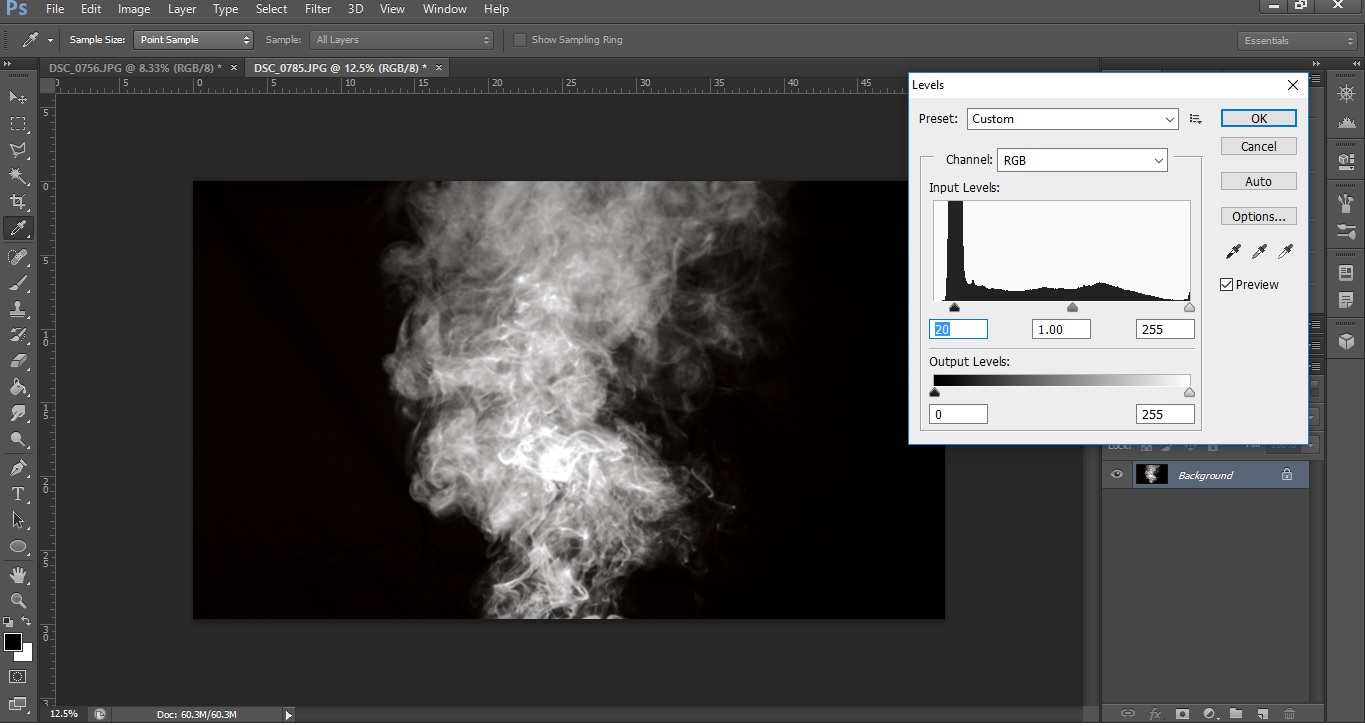
Within this post you can see my mock ups for my poster. I edited a draft with two different photographs I have taken, and edited them to a very small extent to be able to imagine how they would look after they were fully developed. After these draft I have decided to use the first photograph where I am standing instead of sitting.
Sunday, 15 January 2017
Album cover editing and costruction
-JPG or GIF
-Perfect square
-At least 1600 x 1600 pixels in size
-Best quality RGB Color Mode (this includes black and white images)
-If you’re distributing your music to the Amazon On Demand store (for printing physical CDs), you need a resolution of 300 DPI.
DON't -email addresses, URLS/websites, contact info (this includes Twitter handles), pricing,
-stickers from your artwork from a scanned copy of physical CD
-something that suggests format of the release “CD, DVD, Digital Exclusive, disc”
-cut off text or images
-an image that’s compressed into one corner with white space
-names of digital stores or their logos
-words that express temporality, like “new”, “latest single”, “limited edition” or “exclusive
http://www.tunecore.com/blog/2012/12/3-things-you-need-to-know-about-cover-art.html
The website above has helped me to ensure features and rules are included within my media products.

In Able to edit my CD cover I had to research tutorials on YouTube. I have managed to find one: https://www.youtube.com/watch?v=x1jXFUaEMKs which allowed mo to set up certain measurements for my media product


After I have set the pixel measurements I have added a photograph that I have edited earlier on of smoke, and added it onto my cd cover, then created a yellow layer that I have applied to the smoke by pressing ALT down on the keypad and then left clicking on to my smoke layer. Which gave it the gold effect. At very last I only needed to add the writings.
The back cover did not require me to edit any photographs, I simply typed up the name of the songs with the artist, that were featuring and added the record label logos and a barcode
The insert however required me to edit the photograph I have taken of the gold chain. I have done this by increasing the contrast , then horizontally reflected it and decreased the opacity to get a nice and sophisticated reflection


-Perfect square
-At least 1600 x 1600 pixels in size
-Best quality RGB Color Mode (this includes black and white images)
-If you’re distributing your music to the Amazon On Demand store (for printing physical CDs), you need a resolution of 300 DPI.
DON't -email addresses, URLS/websites, contact info (this includes Twitter handles), pricing,
-stickers from your artwork from a scanned copy of physical CD
-something that suggests format of the release “CD, DVD, Digital Exclusive, disc”
-cut off text or images
-an image that’s compressed into one corner with white space
-names of digital stores or their logos
-words that express temporality, like “new”, “latest single”, “limited edition” or “exclusive
http://www.tunecore.com/blog/2012/12/3-things-you-need-to-know-about-cover-art.html
The website above has helped me to ensure features and rules are included within my media products.


In Able to edit my CD cover I had to research tutorials on YouTube. I have managed to find one: https://www.youtube.com/watch?v=x1jXFUaEMKs which allowed mo to set up certain measurements for my media product


After I have set the pixel measurements I have added a photograph that I have edited earlier on of smoke, and added it onto my cd cover, then created a yellow layer that I have applied to the smoke by pressing ALT down on the keypad and then left clicking on to my smoke layer. Which gave it the gold effect. At very last I only needed to add the writings.
The back cover did not require me to edit any photographs, I simply typed up the name of the songs with the artist, that were featuring and added the record label logos and a barcode
The insert however required me to edit the photograph I have taken of the gold chain. I have done this by increasing the contrast , then horizontally reflected it and decreased the opacity to get a nice and sophisticated reflection


Subscribe to:
Posts (Atom)